BC Robotics
Browse categories
- New Additions
- Shop
- On Sale / Clearance
- Popular Categories
- ArduinoArduino is the most popular open source microcontroller platform on the market. These easy to program devices can read sensors, control relays, light up LEDs, and even talk to one another. Their ability to interact with the real world by way of sensors and other electronics makes them ideal for automation such as watering a plant when it is dry, reading the weather, or controlling lights when it gets dark – the possibilities are endless. We carry a variety of Arduino compatible microcontrollers from several manufacturers, each with their own specific strengths and purposes. To further specialize your microcontroller, we carry a large selection of daughter boards (shields) which can add powerful sensors, GPS, or even LCD screens to your project! Just getting started with microcontrollers? We carry a variety of Arduino starter kits to get you reading sensors and blinking lights as easily as quickly as possible!
- BBC micro:bitThe BBC micro:bit is a pocket-sized computer designed for beginners in electronics and coding. The micro:bit makes getting into these often daunting fields as easy as possible. Programming the micro:bit V2 can be done by computer or by their intuitive app available for Android and iOS devices. Code can be designed using a drag and drop interface in the Blocks editor, Javascript, or Python.
- ESP8266 & ESP32The ESP8266 and ESP32 microcontrollers from Espressif are powerful, inexpensive, and feature integrated WiFi connectivity. These are ideal for IoT applications. We offer a variety of different ESP8266 and ESP32 modules for different skill levels.
- FeatherFeather is a flexible and powerful family of microcontroller main-boards (Feathers) and daughter-boards (Wings) designed with portability in mind. All Feathers have integrated battery connectors (and most have built in lipo chargers) The Feather form factor is not locked to a specific chipset or programming language. Feathers are available with a variety of chipsets and on-board features. Most Feathers and FeatherWings have example code and libraries written in Arduino C/C++ and CircuitPython.
- Makey MakeyThe Makey Makey kit is a electronics kit designed for beginners. It explores the concepts of creating circuits through everyday items. When plugged into a computer you can use the Makey Makey to make anything into a keyboard or mouse. No programming required! Projects like a Banana Drum Set, Cat Detector, Musical Stairs, and countless others are easier than you think! We carry the Makey Makey Classic Kit – a starter kit for the Makey Makey – along with extra alligator clips, copper conductive tape, and replacement cables.
- Raspberry PiThe Raspberry Pi was first introduced in early 2012 as a simple, low cost, computer fit onto a circuit board roughly the size of a credit card. The idea was to use this low cost computer to promote teaching of computer science in schools but it has grown to be so much more! Since its release, well over 30 million of these little computers have been sold. We have carried the Raspberry Pi in Canada since it first became available and have watched as the Pi has morphed into a complete development platform with powerful single-board computers, cameras, touchscreens, and other accessories. Its multitude of inputs and outputs for electronics and computer peripherals and its impressive computing power mean it can be used to make just about anything you can imagine. The newest and most powerful version, the Raspberry Pi 4, is now available!
- Popular Brands
- AdafruitAdafruit was founded in 2005 by MIT engineer, Limor “Ladyada” Fried. Her goal was to create the best place online for learning electronics and making the best designed products for makers of all ages and skill levels. In the last 10 years, Adafruit has grown to over 100+ employees in the heart of NYC with a 50,000+ sq ft. factory.
- ArduinoArduino is an ever growing platform used by some of the most popular microcontrollers out there. For many of us, this is where it all started – the Arduino was (and still is today) a pioneer when it comes to making programming hardware easy and accessible. We have one of the largest selections of Arduino and Arduino accessories in Canada. These range from basic Arduino Uno, to Cellular and WiFi connected devices perfect for the Internet of Things, and all the accessories needed to get them running!
- Micro:bitMicro:bit Educational Foundation are the manufacturers of the popular BBC micro:bit; a pocket-sized computer designed for beginners in electronics and coding. The micro:bit makes getting into these often daunting fields as easy as possible. Programming the micro:bit V2 can be done by computer or by their intuitive app available for Android and iOS devices. Code can be designed using a drag and drop interface in the Blocks editor, Javascript, or Python.
- BC RoboticsIn addition to stocking 2000+ unique items, we also manufacture our own accessories right here at BC Robotics. In 2014 we began developing our own widgets and add-ons for Arduino, Raspberry Pi, and general prototyping. This has now grown to over 80 different SKUs. Our boards are assembled in-house with top quality components. Many feature detailed tutorials or project guides to get you up and running as quickly as possible!
- Raspberry Pi
- SparkFunSince 2003, SparkFun has been helping turn ideas into reality – whether you’re creating a smart weather station, exploring the frontier of machine learning, building a robot for school or prototyping your first (or tenth) product. No matter your vision or skill level, our open source components, resources and online tutorials are designed to broaden access to innovative technology and make the road to a finished project shorter. We’re here to help you start something.
- Frequently Asked Questions
- My Account
- Wishlist
- Cart
Running a Python Program on boot with the Raspberry Pi
PRODUCT TUTORIAL
- Chris @ BCR
- October 2, 2018
- 12:30 pm
- 10 Comments
One of the most common questions asked about the Raspberry Pi is how to get code you wrote to run automatically as soon as you boot it up. We get why this question is so common; a lot of people have entered this world of open electronics by way of the Arduino, and simply giving it power will start it up and run your code. With the Pi, there is a lot more going on so in this tutorial we will show you how to get your code up and running automatically as soon as the Pi starts.
There are a lot of different operating systems out there for the Raspberry Pi, so we are going to focus on the most popular: Raspbian. We are using the version dated: 2018-06-27 deviating from this may result in different / additional steps so if you are very new to this, we recommend following the tutorial exactly. Please Note: This will not work on the Lite version of Raspbian.

The Parts Needed:
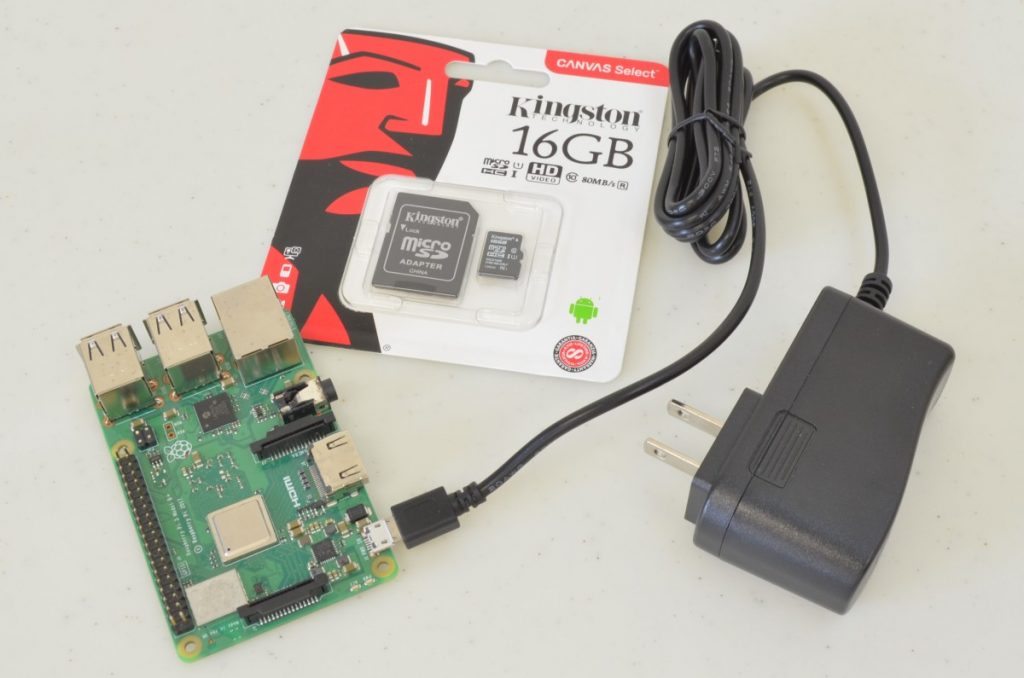
This Raspberry Pi tutorial will be requiring a few parts:
- 1 x Raspberry Pi
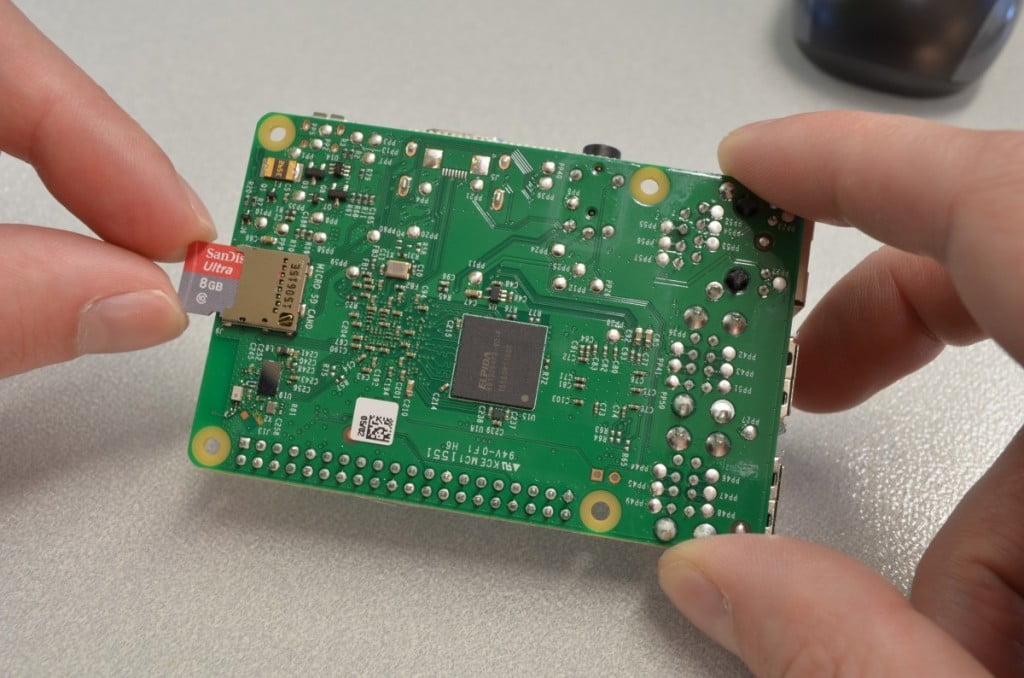
- 1 x microSD card (with Raspbian 2018-06-27 or newer)
- 1 x Raspberry Pi capable power supply
- A Python Script that you would like to run on boot
Step 1 - Get Everything Prepared
Step 2 - The Method
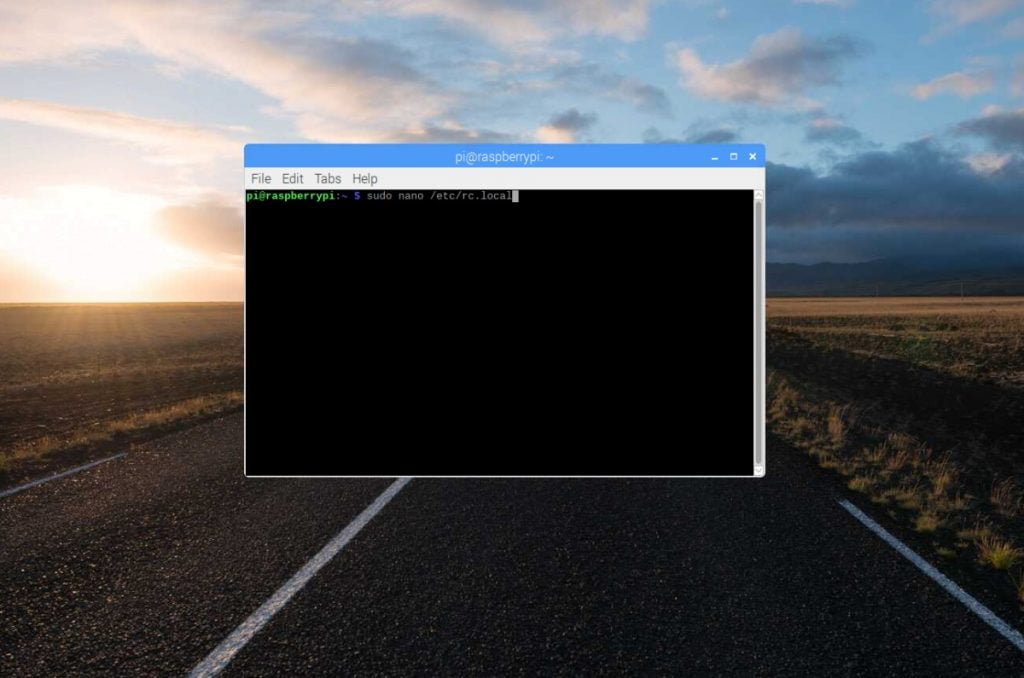
There are numerous ways to accomplish this task of running a program on boot. We have picked the rc.local method as it seems to work for beginners with the least amount of hassle. We are going to edit a file called rc.local and add a command that will run our python program any time the Raspberry Pi boots up. You can add multiple commands to this file and run multiple programs – each one is run in order from top to bottom. Start by opening the terminal.
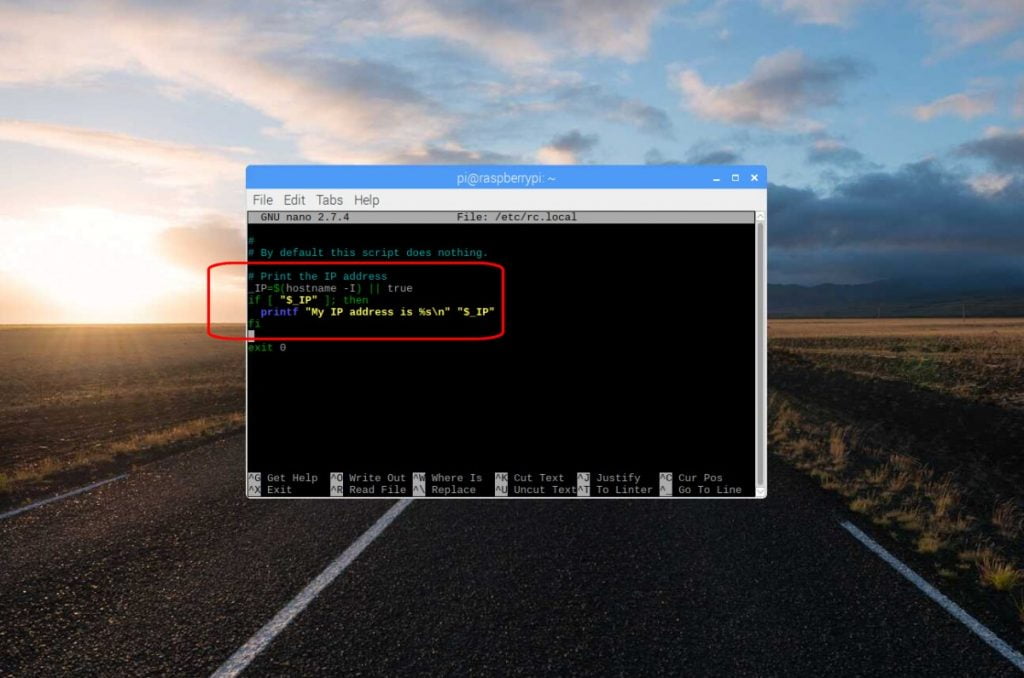
Step 5 -Add The Command
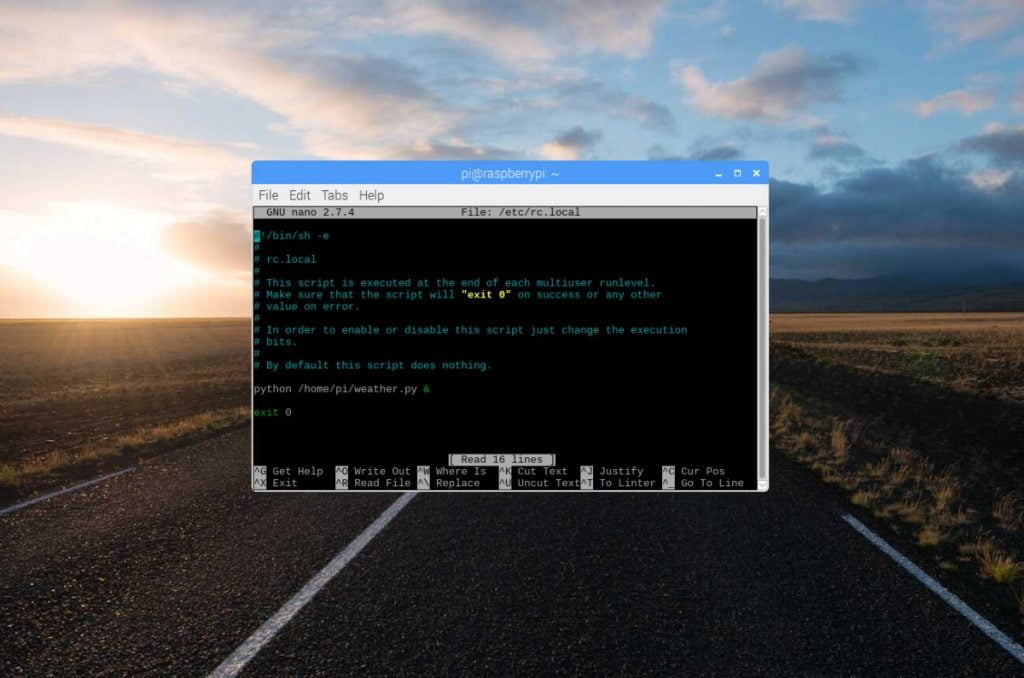
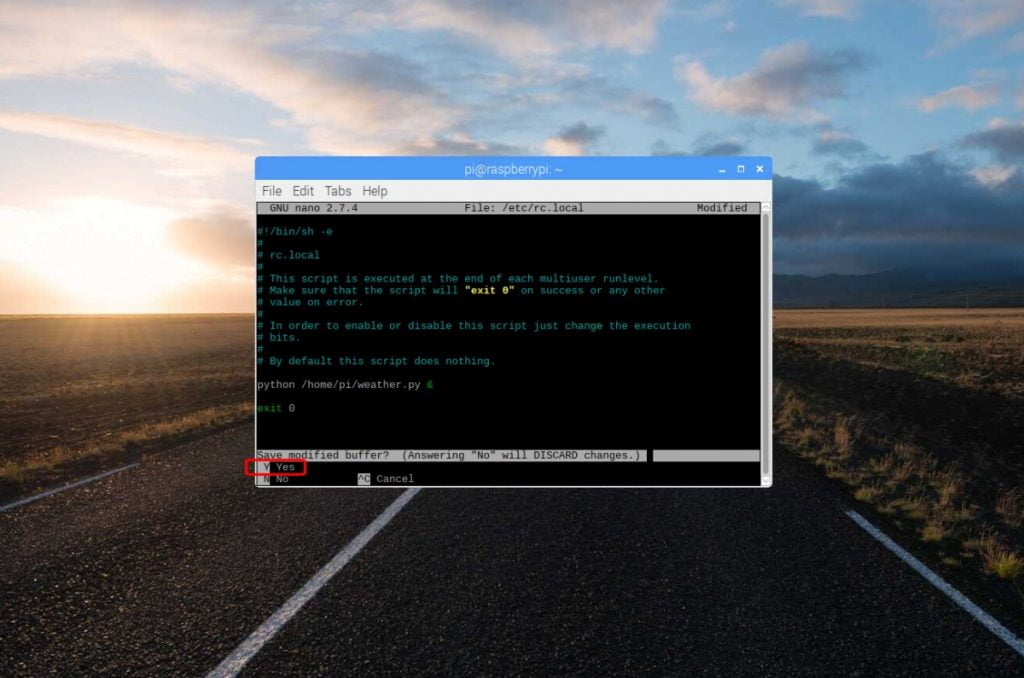
Depending on where you saved your file and what you called it, your code will vary slightly. We called our file “weather.py” and saved it in the directory /home/pi/ so we are going to add this line above “exit 0”:
python /home/pi/weather.py &
It is important to note that we were using Python 2.7 to write our file in this tutorial, if you wrote your python file using Python 3, you will want to use “python3 /home/pi/startup.py &”
You will also notice an ampersand at the end of the command. This is important if your python script is intended to keep running in the background indefinitely (or for a long period of time). The ampersand is used to fork the process and allow the operating system (and other programs) to continue to load. So if you have a simple script that is only supposed to run for a second or two when the Pi boots – leave it out. If you are running something like a datalogger or our weather station, you will definitely want it there!


10 thoughts on “Running a Python Program on boot with the Raspberry Pi”
Nik Rowland
Be aware that there seems to be a limit to the number of characters allowed in the path/filename string in the line added to rc.local. It is somewhere between 29 and 45 in that 29 works for me and 45 doesn’t. This had me stumped for months. I use Python 3. Thinking back to DOS and shortening the file name did the trick.
In your example line,
“python (/home/pi/weather.py) &”
the string between the brackets is where the character count is critical.
Always test your line for correct function in a Terminal window. If it works there it will work in rc.local. If it doesn’t work in a Terminal window, then at least you will get an error message. In my case ‘unable to find file’ error meant the string is too long.
Chris @ BCR
Nik – interesting point! We haven’t ever come across that issue but testing in a terminal window is always very good advice!
katunziv
thanks, but what if i want to run a script on start up and the scripts prints some outputs which i should see them on the terminal, what can i do
john
this method wont worked if u have input() on your code
Nik Rowland
katunziv,
Have you tried arranging for your Pi to boot into a CLI (a terminal window) rather than the Desktop. You should see your printed outputs then.
To do this go :-
‘Applications Menu’>’Preferences’>’Raspberry Pi Configuration’ and in the ‘Systems’ window change from ‘Boot to Desktop’ to ‘Boot to CLI’ and reboot.
When you’ve finished and wish to return to the Desktop just type ‘startx’. You can then re-edit the configuration and reboot again.
Robert Macmillan
This is helpful. How do I “compile” my python program, or otherwise hide the source code from the user?
Thank you
Brad
Hi. I am pretty new to this. I am using a Pi zero, and the newest release of the Raspberry Pi operating system. My code runs in a terminal window without a problem. I followed your directions exactly. It seems the code loads to a certain extent. LED flashes as it should, but I get no response from my WiFi keypad. I have tried several other methods as well to run code on boot, mostly with the same result. Any info would be greatly appreciated. Thanx.
Oliver
Hi Chris, thanks for this very clear description.
The setup is very straightforward with only one py script running on a clean OS.
The script is a very simple MQTT application, which is running fine when launched from the CLI.
$ python home/pi/mqtt_app.py &
It doesn’t require any input or output from the CLI, it’s just running in the background, waiting for MQTT pub to activate GPIOs.
But something seems to prevent the script to launch, can’t figure out. It’s driving me nuts !
Jordan
Does this work with a python virtual environment? I can’t get it to work on my raspberry pi zero 2 w
mike87
Python changing things every few years to ensure 90% of tutorials on the internet don’t work…