In this tutorial we are going to go in a little bit of a different direction – this will be a project tutorial, which when followed, will result in a working Raspberry Pi based Weather Station that streams data to the ThingSpeak Data service. We will break this down into four components: A board overview and assembly guide, collecting the data using python, sending the data to ThingSpeak, and finally a section looking at installation outdoors. The tutorial is focused on our Raspberry Pi Weather Board, designed and manufactured here at BC Robotics.
About the Board: The Pi Weather Board was designed to make the often messy task of connecting a bunch of different sensors to the Pi as organized as possible without compromising on choice of sensors. The board also addresses the Pi’s inability to read analog inputs with a built in 4 channel 12-bit Analog to Digital Converter.
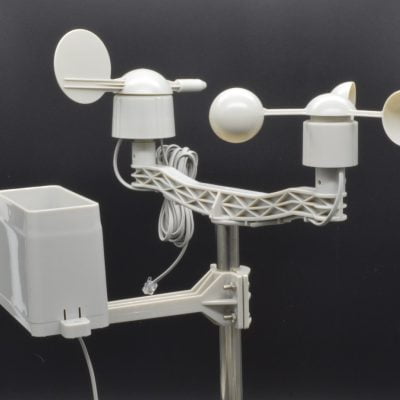
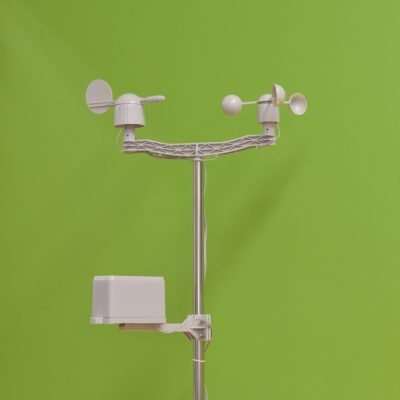
So what parameters does it measure? The board itself doesn’t have any sensors on it, so this is going to depend on which sensors you choose to go with. Following this tutorial with the suggested parts will result in a weather station monitoring Wind Speed, Wind Direction, Rainfall, Temperature, Air Pressure, and Humidity. Going forwards, additional sensors could be added without much trouble.
The Parts Needed:
In addition to a Raspberry Pi, this tutorial will be requiring a few additional parts:
Going forwards there will also be tools and other components required – we will discuss these throughout the next 3 parts of this tutorial.
Step 1 – A Quick Overview of the assembly steps
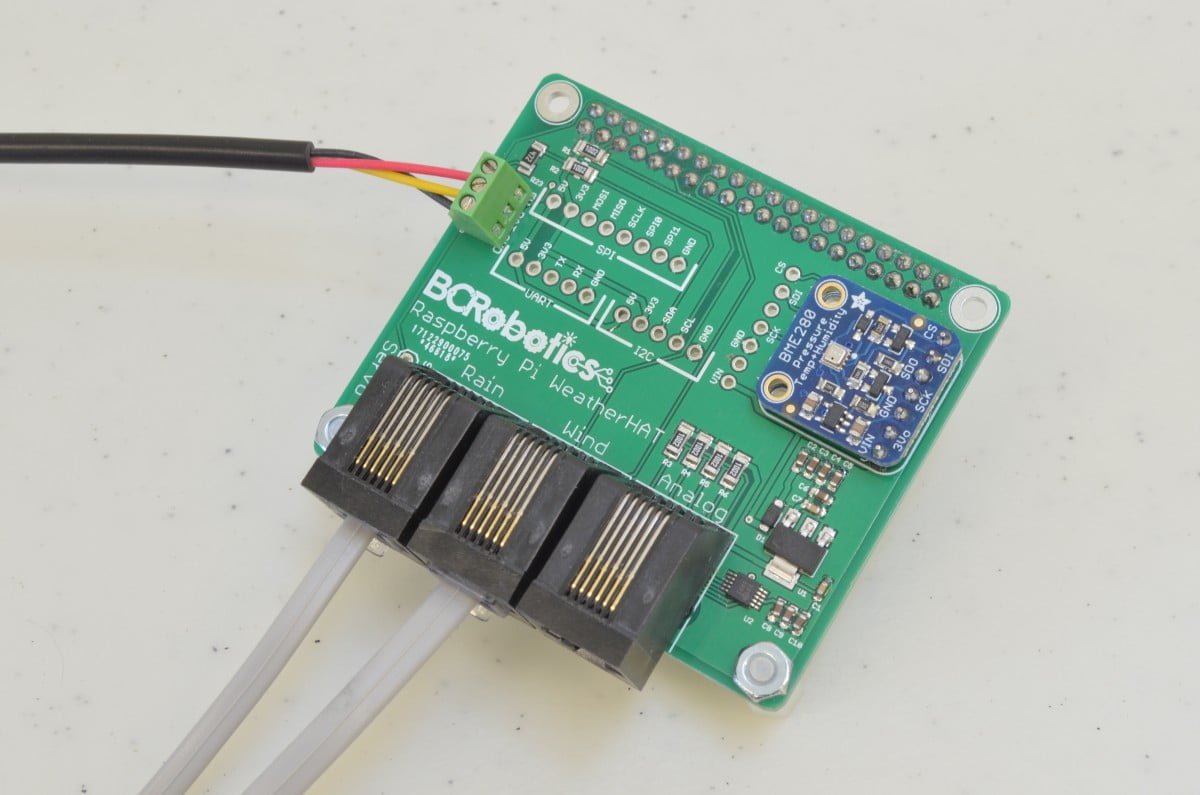
Most of the difficult tasks have already been taken care of by the Weather Board so assembly wont be too bad! We are going to start by soldering the stacking header to the Pi Weather HAT. Once that is completed, we will solder Adafruit BME280 breakout board, add the DS18B20 Temperature Sensor, and plug all of the sensors in.
9.1%
Step 2 – Soldering the header
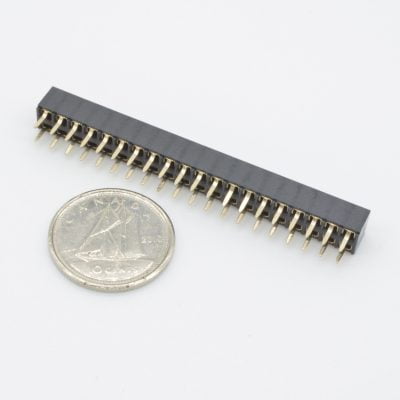
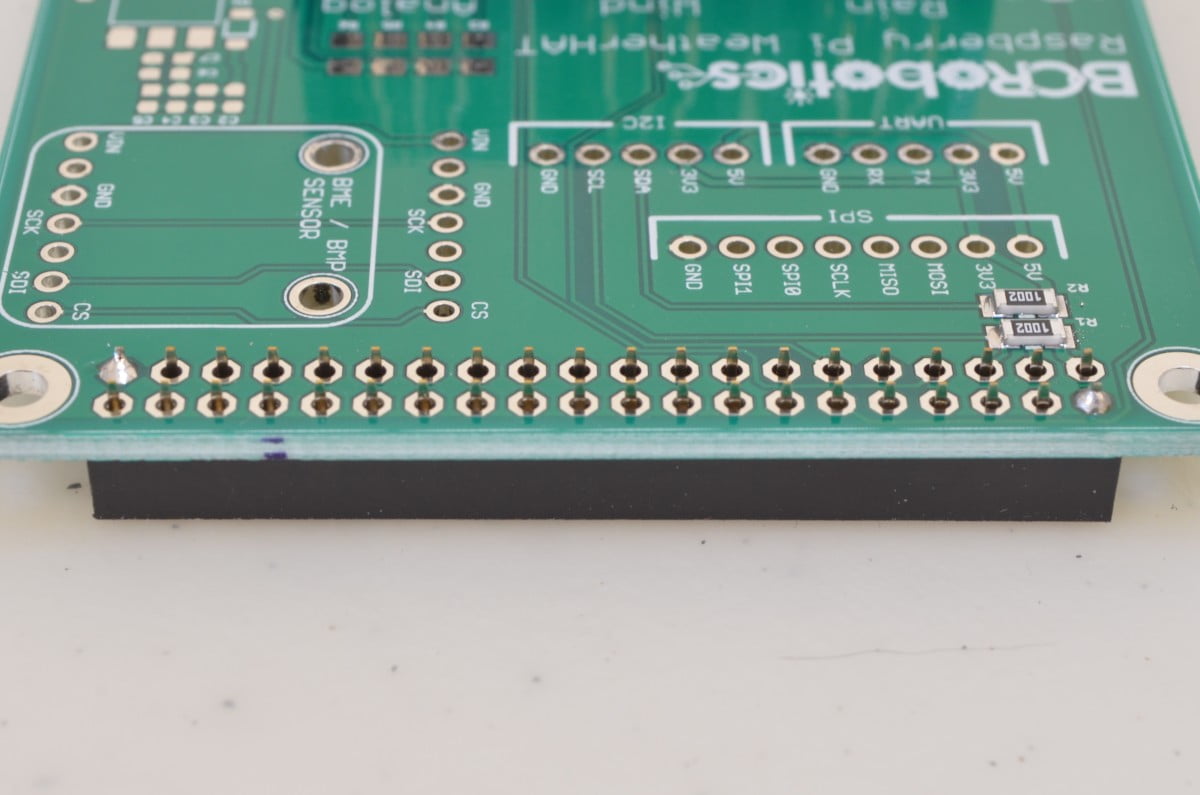
First we need to solder the header that allows this board to plug into the Raspberry Pi. We recommend using this header, but any compatible Raspberry PI GPIO header will work. If you haven’t soldered before, or want a quick refresher course, have a look at this awesome comic: Soldering Is Easy! https://mightyohm.com/…/FullSolderComic_EN.pdf
Start by Tacking two opposite corners of the connector in place and checking the connector alignment. We do this to ensure the connector is sitting correctly before soldering all 40 pins; once these have all been soldered, it is very difficult to adjust the alignment.
18.2%
Step 3 – Soldering the header (continued)
Once the connector is aligned to the board, and you are happy with the alignment, solder the remaining pins. It should look something like the attached photo when you are finished!
27.3%
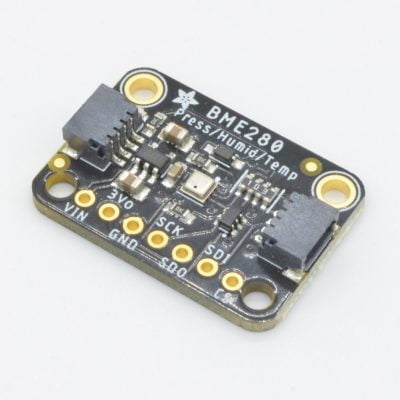
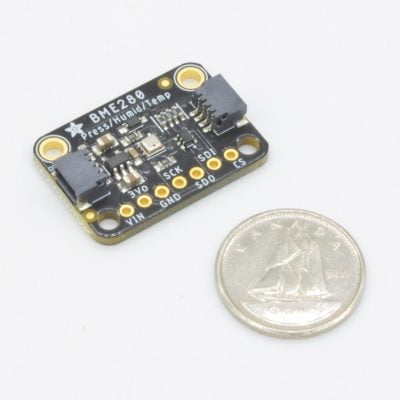
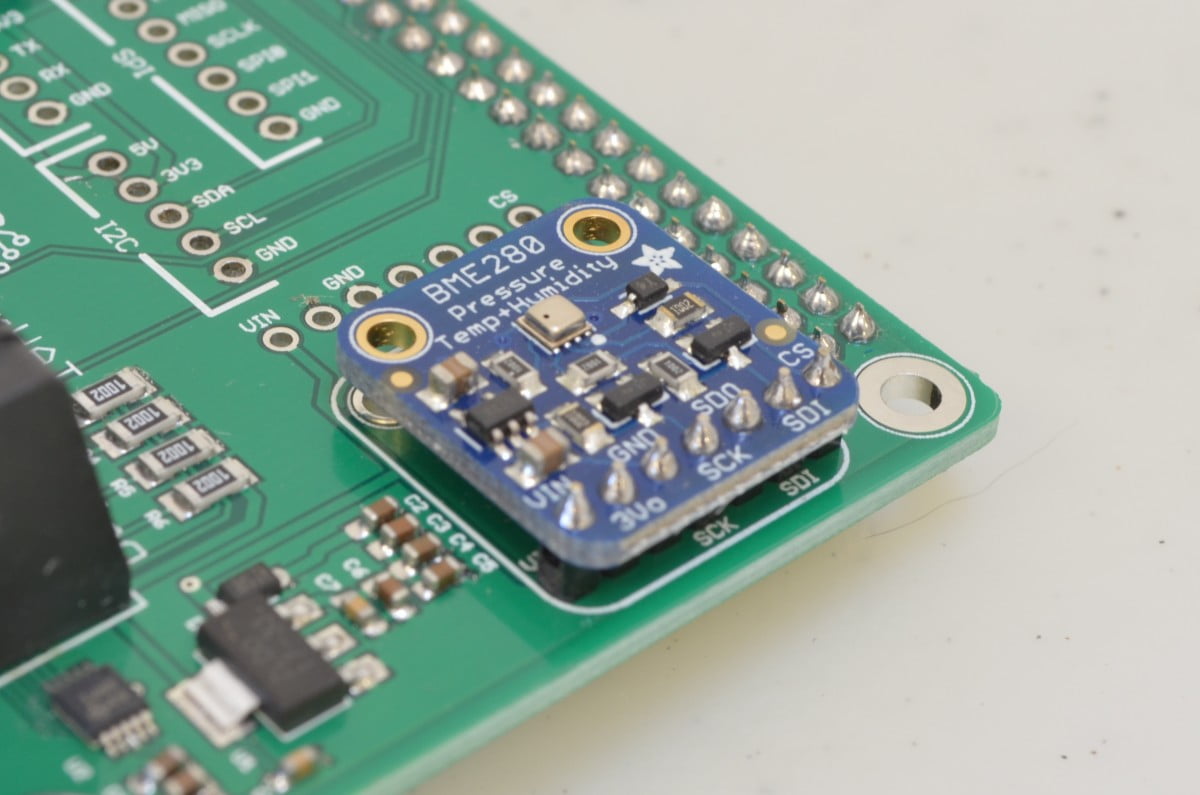
Step 4 – BME280 Part 1
The BME280 is an awesome little Temperature / Humidity / Pressure sensor and it works great with the Pi!
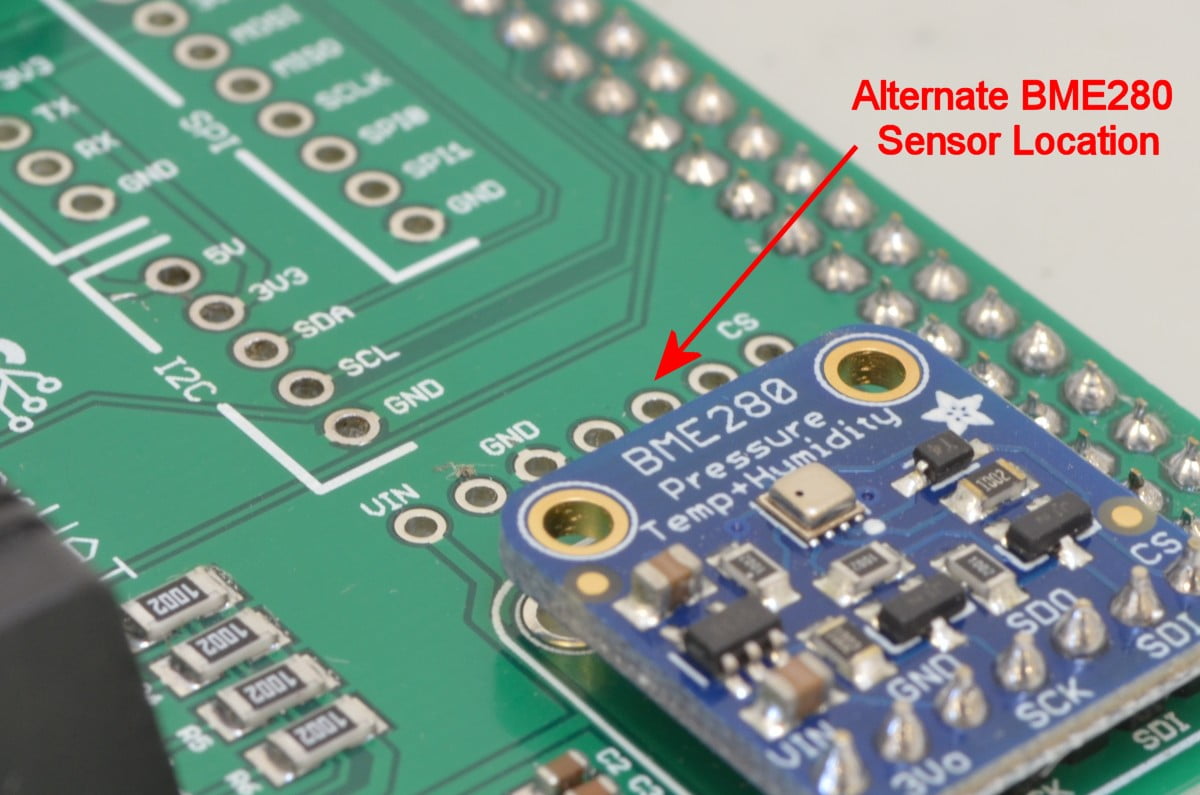
If you are using the Raspberry Pi 3+ or Raspberry Pi 4 there are a few things to consider. The Pi3+ and Pi4 have an extra 4 pin header for Power over Ethernet (POE) capabilities. This connector will likely contact the pins on the bottom of the BME280 if it is installed in the normal position on the Weather Board. There are two ways this can be avoided: Remove the POE header (since it can be easily re-installed later) or install the BME280 in the alternate pin location as shown in the attached image.
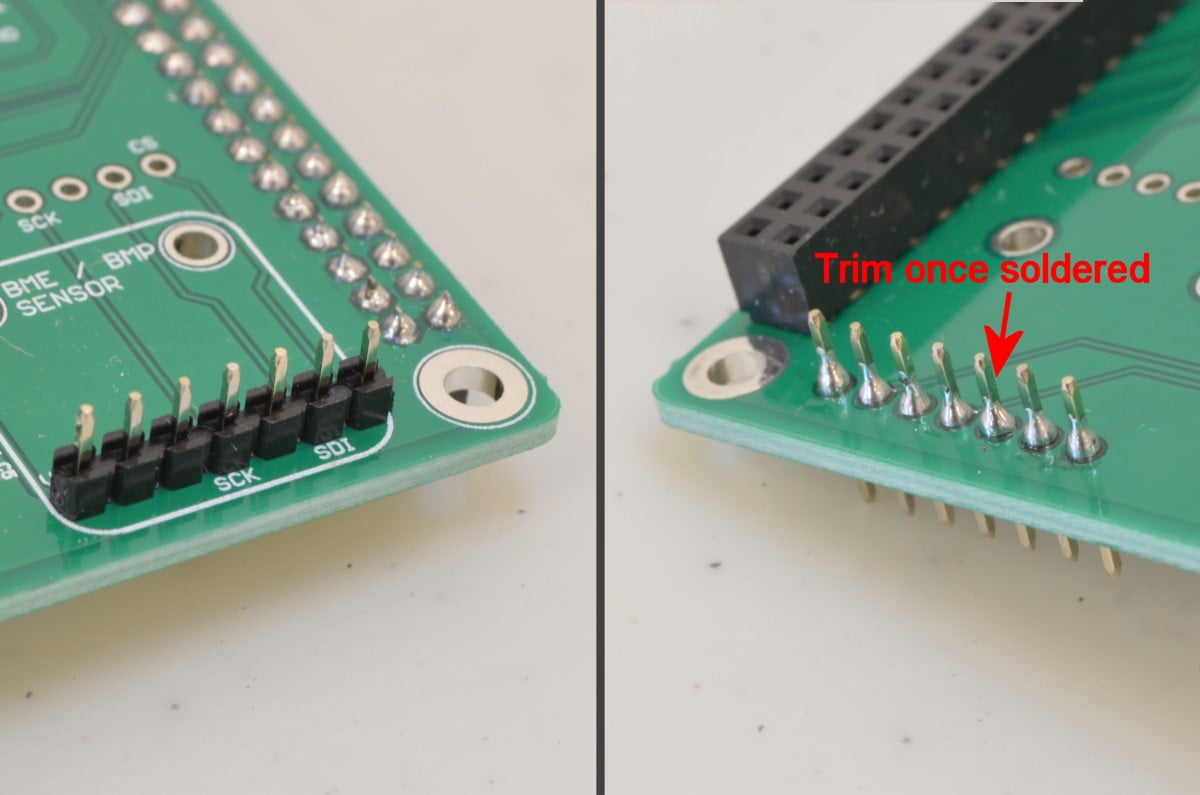
Once you have sorted out where it will be located, solder in the chunk of breakaway header to the Pi Weather Board. This breakaway header is normally included with the BME280.
36.4%
Step 5 – BME280 Part 2
Flip the board back over, and place the Adafruit BME280 on the pins, matching the orientation to that of the board footprint. Tack one of the corners to set the board in place, and once you are happy with the position, solder the remaining pins.
45.5%
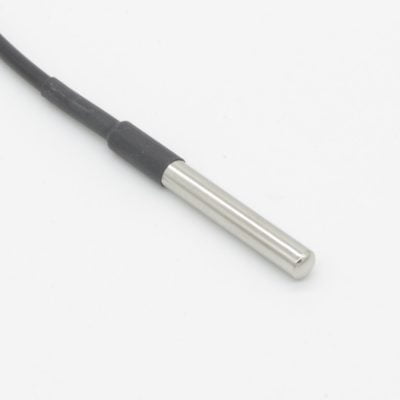
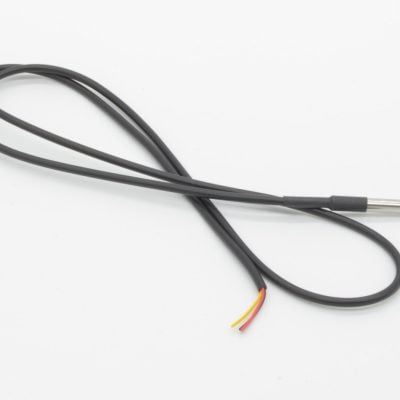
Step 6 – DS18B20
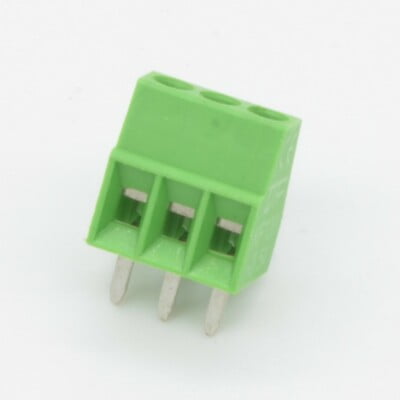
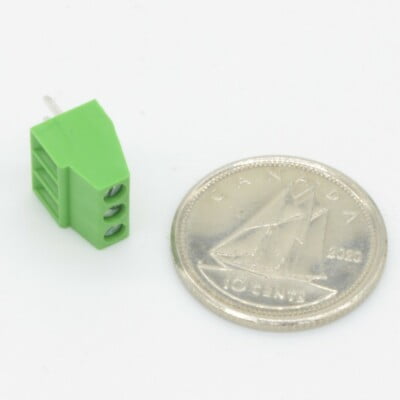
Next we are going to install a screw terminal to connect the DS18B20 Temperature Sensor. The DS18B20 is weatherproof, so the probe will actually be mounted outside of the box, with the wires running into the board, so having them removable will make the installation into a box much easier going forwards. If you prefer, you could also solder the wires direct to board.
We went with a screw terminal on this one, but any standard 3 pin 2.54mm pitch connector would work. Just like all the other connectors, tack one pin in place, check the alignment, and solder the remaining pins.
54.6%
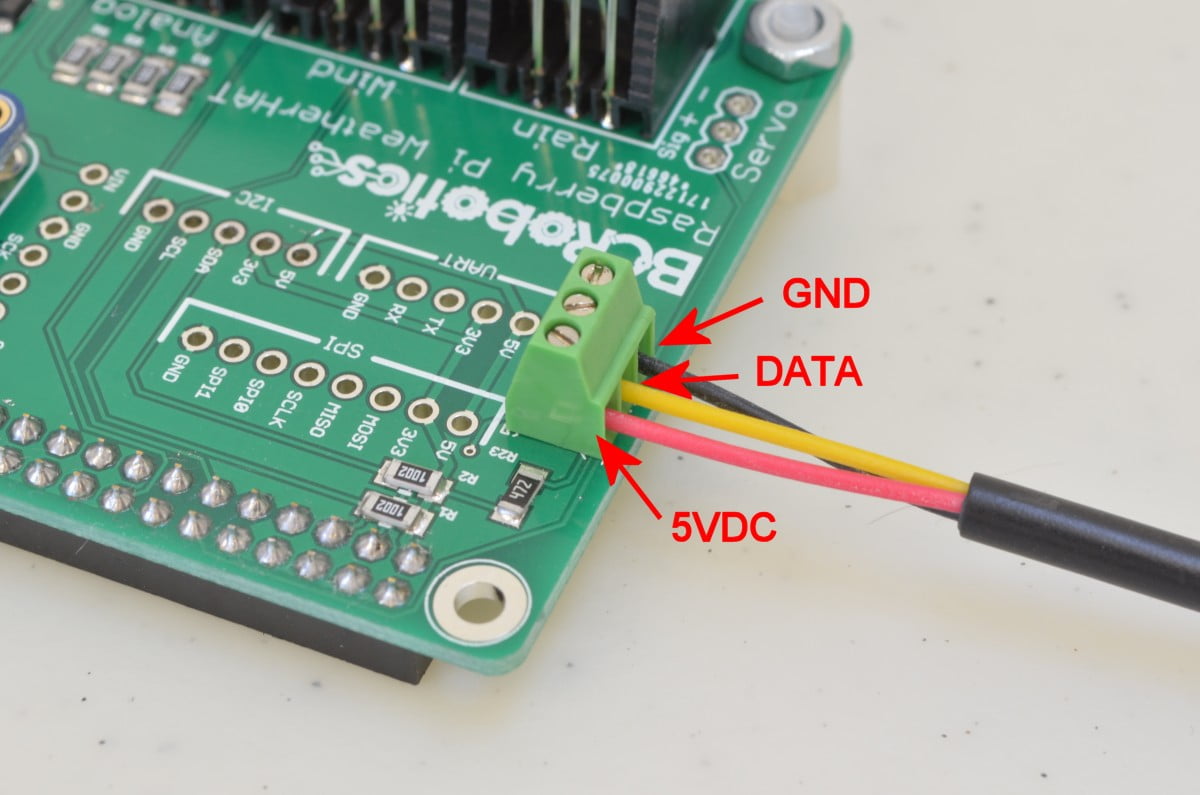
Step 7 – DS18B20 Continued
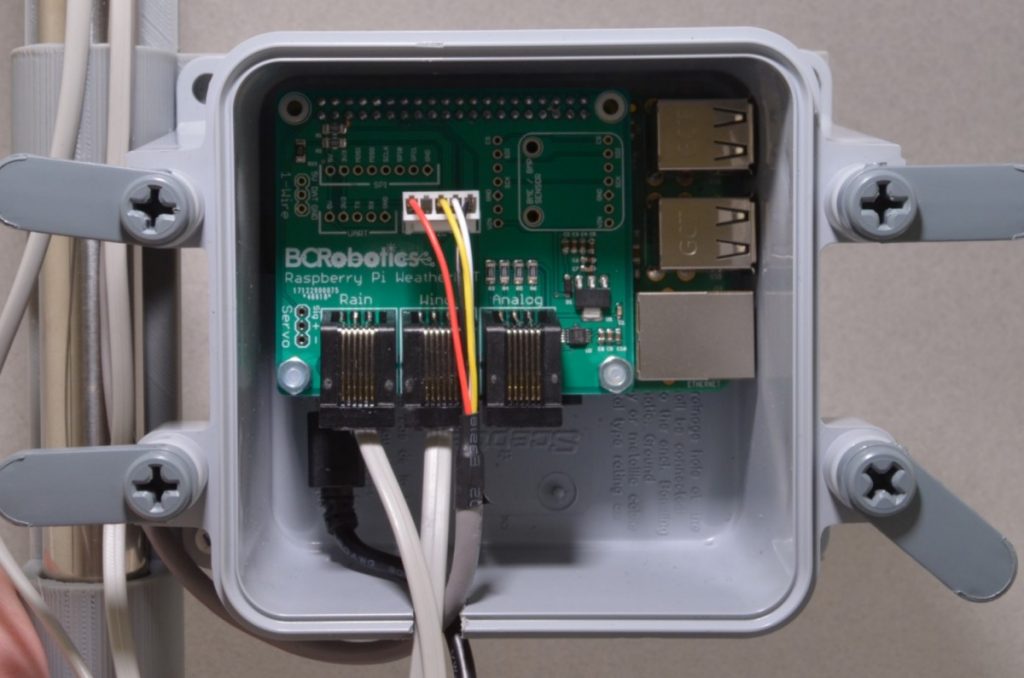
The DS18B20 can ship with two different sets of wire colors – these are often seen with Red, Black and White or Red, Black, and Yellow. Normally Red will be power, Black will be Ground, and White / Yellow will be the Data pin. Be sure to check the pinout, we list it on our product page for the DS18B20.
A 4.7K Ohm Resistor is normally needed to between the 5V and Data Pin when using the sensor; this is taken care of by the Raspberry Pi Weather Board – so no need to wire one in!
Connect your DS18B20 according to the color code of your sensor.
63.7%
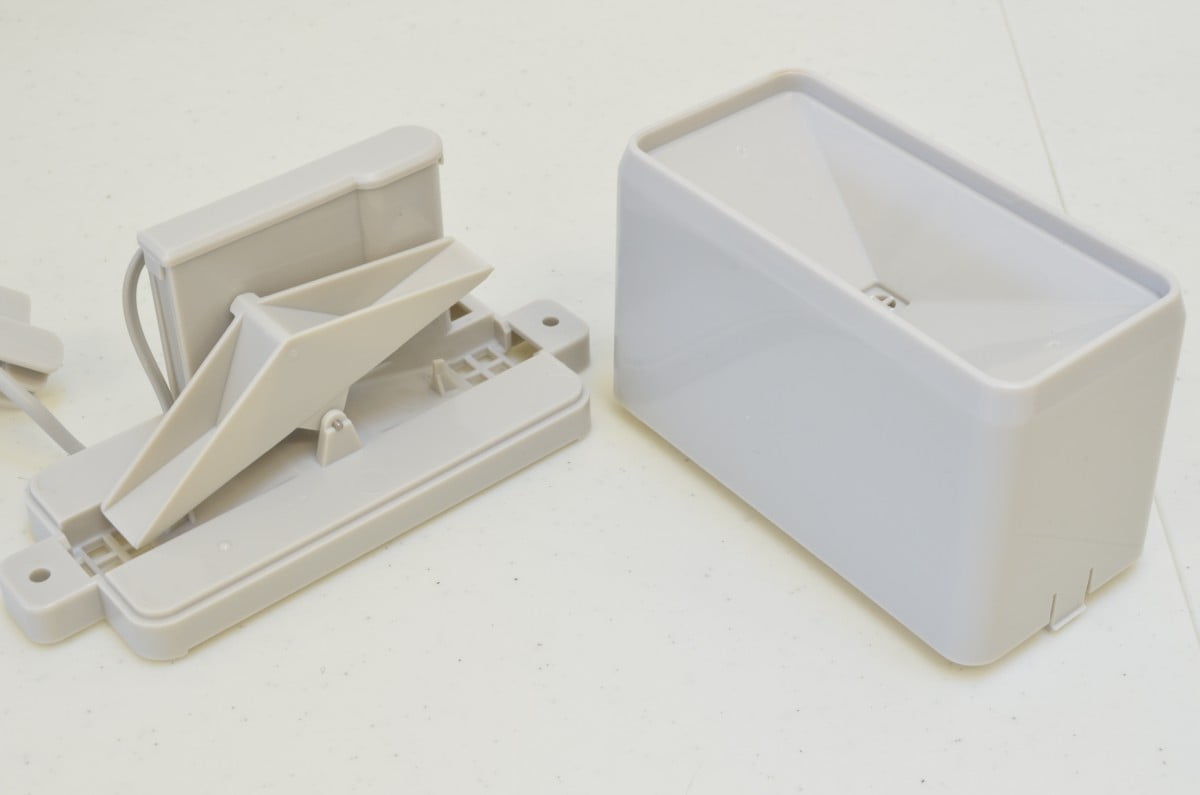
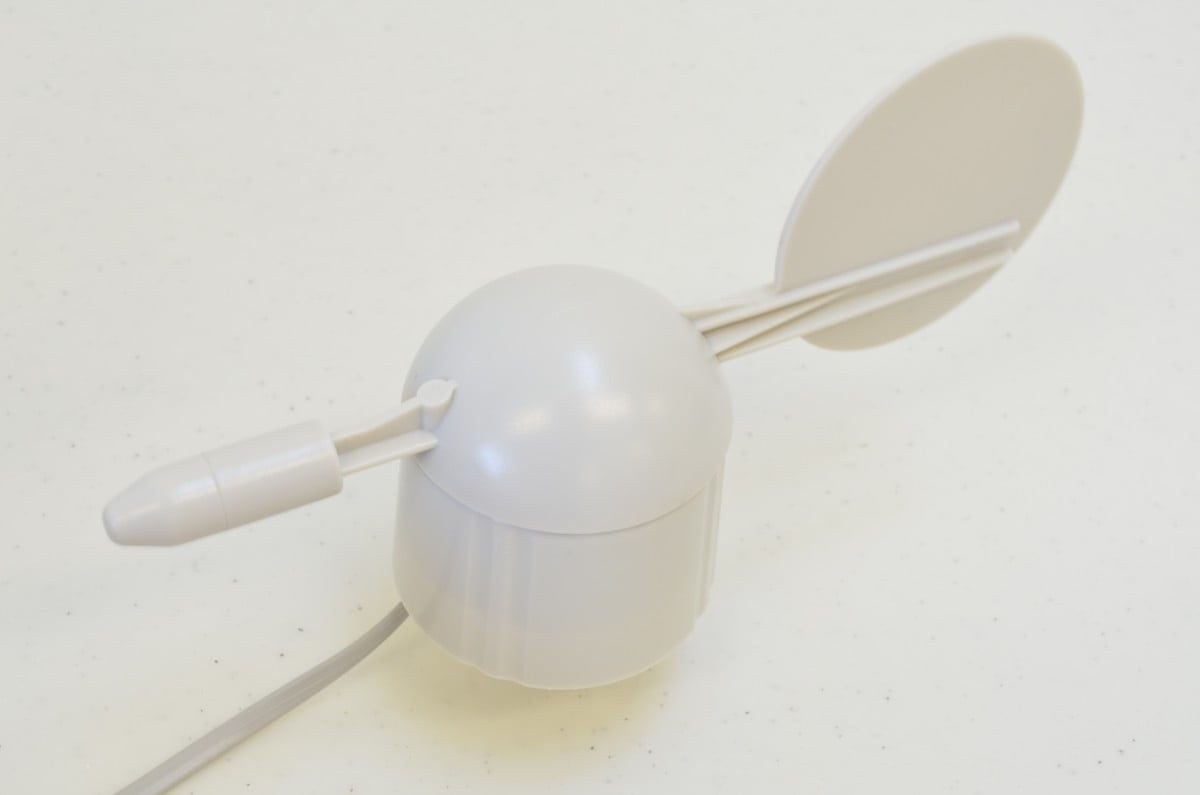
Step 8 – Rain and Wind Speed
The Wind Speed, and Rain Gauge are both basic digital sensors. The Anemometer (Wind Speed) is measured by counting how fast it spins in a given amount of time while the Rain Gauge measures how many times the gauge tips a precise amount of water over a given period of time. There is no soldering for these ones – they will just plug in along with Wind Direction. More information on the sensors and how they work can be found on their datasheet.
72.8%
Step 9 – Wind Direction
Wind Direction is a bit more difficult with the Pi – Wind Direction sensors are often analog, and this one is no exception. So why are the difficult? Well, the Raspberry Pi doesn’t have an Analog to Digital Converter. But no worry – the Weather Board also handles this problem. We have included a 4 Channel Analog to Digital Converter. All we have to do is plug it in!
81.9%
Step 10 – Connecting the Wind & Rain Sensors
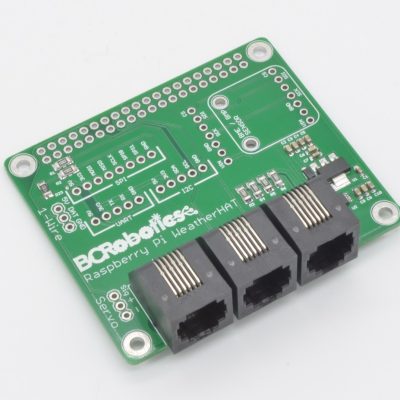
Connecting these sensors is quite straight forward – if you look carefully, one of the two RJ11 plugs at the end of their cables has 4 wires in it, while the other has two. Plug the 4 wire line into the “Wind” plug on the Weather Board, plug the 2 wire line into the “Rain” plug.
90.9%
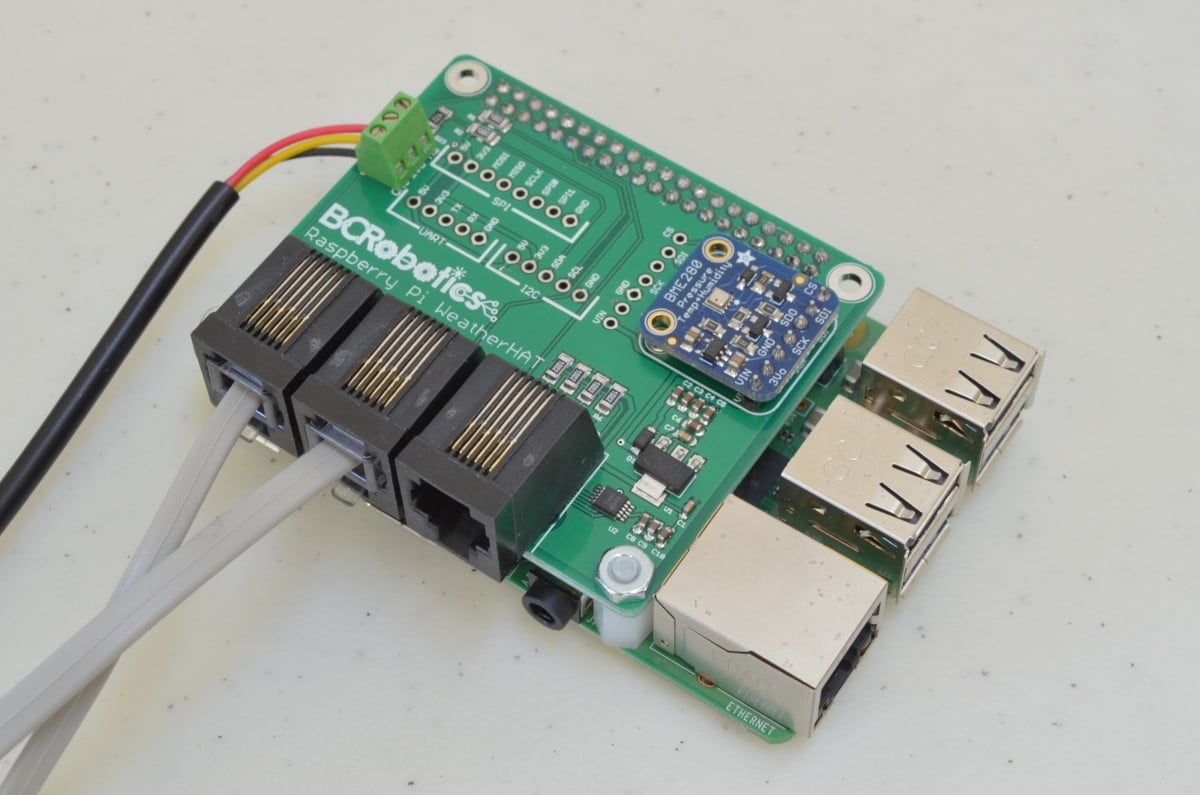
Step 11 – Double Check Your Work!
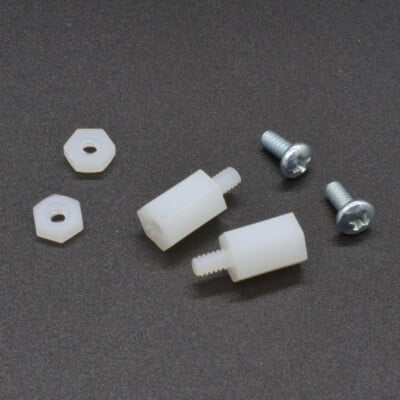
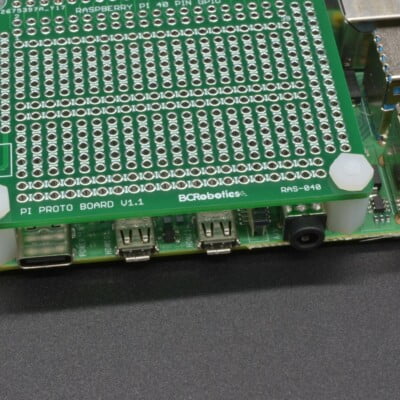
Before we power anything up, it is always a good idea to go through and make sure there are no issues with the work that has been done. Make sure all the solder joints are clean, with no un-intended bridging. Check to make sure all the sensors are plugged in correctly, add the two standoffs as shown, and connect the board to the Raspberry Pi. If using the Raspberry Pi 3+ be sure to check the POE header (located near the USB ports) is not contacting the header from the BME280 header between the Pi and the Pi Weather Board.
In the next section of this tutorial we will be getting the Raspberry Pi set up with the Raspbian operating system, installing software libraries for each sensor, and writing some basic Python code to read the sensor outputs. Ready to tackle it? Head over to Part 2!
100%
33 thoughts on “Raspberry Pi Weather Station – Part 1”
scoobytoo
What is the timing on the second part. Can you provide the starting point with what software libraries your going to use.
Louis, aside from mounting, no there isn’t any reason you couldn’t go with the Pi Zero (or an A+ with a Wifi dongle for that matter). With the Zero you could probably look at reversing how the boards stack (if you haven’t soldered the Zero header already) and just mount the weatherboard with the zero above (or off to the side using a right angle header https://bc-robotics.com/shop/2-x-20-right-angle-header/) – Just be careful with the pin orientations in that case!
I have a super silly question to ask. To quote your text from above “A 4.7K Ohm Resistor is normally needed to between the 5V and Data Pin when using the sensor; this is taken care of by the Raspberry Pi Weather Board – so no need to wire one in!” I am trying to understand when I would need a resistor, and how to select the correct one for whatever piece I am trying to fit in. What happens if I have a few things wired in? This I know is a super basic question, but thats where I am at. Trying to learn this stuff. Also, I know in this case the weather shield handles he resistor needs in this case, my question was more a general query.
Thanks so much for putting this tutorial together. I am just now trying to fumble my way thru it. I’ve been wanting to do a weather station for a good long while now!
In most cases, the item requiring the resistor would have information in its datasheet indicating what additional components are required to make it function. We mention it in the tutorial because it is very common for this sensor to ship with the required resistor in the package as well – which, in this case, is unneeded. Let us know if you have any additional questions!
This is about the DS18B20 proposed for the station. It is indicated from -10 ° C to + 85 ° C (± 0.5 ° C Accuracy). I would like to use this sensor in winter with temperatures of -40 ° C. What is Accuracy? Is it possible to use this sensor for such cold temperatures especially in Canada?
It will handle -40, they claim right down to -55. From -10 to -29 they state an error margin of +/- 1 Degree , below -30 this increases to +/- 2 degrees.
Hi, I have built the weather station which works when I manually start the Python code fine. the problem is it wont auto start. Any ideas for what I can try?
Hi. I’ve set this all up on an older RPi 2B model. Getting the ‘Unable to communicate with sensor, check permissions.’ error and /sys/bus/w1/devices is empty. Green light showing on BME280. Any suggestions?
Hi Chris. Yes so I figured that part out eventually and devices are showing up in /sys/bus/w1/devices. I’ve now got an issue with pip and Python 2.7, as Python 2.7 was EOL 2 months ago. It seems running the latest RPi OS + updates + python may not support these scripts without some python tweaking possibly as the BCRobotics-test-app.py is throwing errors. I am using the latest version of Raspberry Pi OS Lite if this helps.
So bit of an update and sorry for the long post. I managed to start a fresh install but this time I made sure I used python3 for every install command, with a few other bits and pieces. I had to update about 2 lines of code in BCRobotics.py ‘print “%s\r” % msg’ to ‘print (“%s\r” % msg)’ and add brackets to the very last line as well. My remaining issue is the ds18b20 sensor keeps dropping off and disappearing, causing the engine and StdReport to error out. The only way to temporarily fix this is to completely power down the Pi each time. I have tried 2 separate Pi’s and a 2nd HAT board too which I purchased, same result. Suggestions welcome as I’m almost there 🙂
I have bought and received the weatherHat and I thank you.
I wish to “extend” this weather station (add sensors (UV, light, environment, air quality,…), Weewx website,…). For i2c,, no pb, Serial too. For analog, what is the pinout of the 3rd RJ12 ? 3 pairs to the 3 ADS1015 inputs ?
Looking down on the connector from left to right:
– Pin 1 & 2: ADC Channel 2 (A1)
– Pin 3 & 4: ADC Channel 3 (A2)
– Pin 5 & 6: ADC Channel 4 (A3)
Pins 1,3,5 are GND pins, Pins 2,4,6 are tied to 3.3V through 10K resistors and their respective ADC input. The pullup resistors are easily removable:
– Channel 2: Remove R4
– Channel 3: Remove R5
– Channel 4: Remove R6
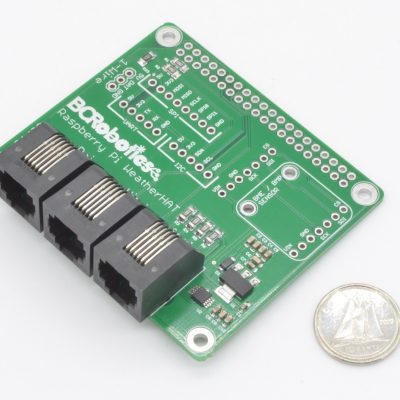
Yes – additional sensors can be added using the three headers in the top right corner of the board. We break out the UART, I2C, and SPI busses with complete with 3.3V or 5V power. Just insure everything maintains 3.3V logic level signals.
Hello from France and thanks so much for this tutorial, my 14 year old son and I have had a lot of fun building this. We have the Weather Hat running with a SEN-15901 kit from SparkFun. We have had the weather station up and running since August but have never been able to get the rainfall to work. I’ve added some debug print statements in the code but it’s not registering ticks. Wiggling the RJ11 connector seemed to get a tick to register and I also tried a simple test with just and RJ11 cable on it’s own and making the connection I managed to get ticks to register so assumed there was bad connection in the rainfall sensor. Mouser kindly sent me a new kit for free and I have just wired up the new rainfall sensor expecting it to work but it still does not register. Does anyone have any ideas on what I might be doing wrong? Is it possible to wire the rainfall sensor to the Analog port instead and if so what do I need to change in my code to pick up a reading? Thanks for any suggestions
– In the summer the temperature sensor seems to get a lot hotter than my neighbours, I have this enclosed in a plastic “hat” taken from an old shop bought weather station, it has plenty of space to breathe and is under a canopy. Should I do something to calibrate this down?
– If we want to add extra sensors do you have any recommendations of compatible sensors or what to consider when buying these? I am using a rpi 3b
Temperature is highly location dependent – the temperature being read is probably correct for that location, but if your goal is the local average, there are measurement standards set out to achieve the best results. Typically these involve the use of a Stevenson Screen ( https://en.wikipedia.org/wiki/Stevenson_screen ) and locating the weather station in an open area at least 2x as far away from the height of tall objects in the area (at least 100 meters away from a nearby 50 meter tall tree, 10 meters away from the 5 meter tall building, etc.) and 1.2 to 2 meters off the ground.
Over the years I have relocated my station several times. Initially it was in the middle of the yard ~10 meters away from my heat pump, but during cold, calm, nights when the pump went into a defrost / de-ice cycle I could see a noticeable change in the readings in real time – so it was moved further away. That lead me down a rabbit hole of searching for all reasonable parasitic heat sources and eventually ended with going as far as locating the temperature sensor away from the main enclosure as well. I now have the temperature sensor in a separate Stevenson Screen approx. 1 meter away to reduce the Pi’s influence on the temperature.
Going beyond, ground temperature is an easy one to add. You can use numerous DS18B20 sensors on a single bus, so wiring a second one in and sticking it in the ground was rather interesting. I also added a CDS light sensor to the mast (via one of the extra analog inputs). Air quality sensors are becoming quite reasonable as well, but I haven’t gone down that road yet
Hi, i want to build something for automated mushroom production, but as far as i can see, both the adafruit BME280 and the pi sensehat are inside the weatherproof case, which makes it a little redundant. any advice about how to weather various sensors such as co2, oxygen, temp, humidity – with 100% humdity? i assume i would need a waterproof case and the sensors outside the case.


33 thoughts on “Raspberry Pi Weather Station – Part 1”
scoobytoo
What is the timing on the second part. Can you provide the starting point with what software libraries your going to use.
Chris @ BCR
We are going to use the Adafruit ADS1x15 library and the Adafruit BME280 library – detailed tutorial should be out in a couple weeks 🙂
Louis De Lange
Apart from the issue of mounting the weatherboard on the Pi, is there any reason why this project cannot be done with the Pi Zero W?
Front Desk @ BCR
Louis, aside from mounting, no there isn’t any reason you couldn’t go with the Pi Zero (or an A+ with a Wifi dongle for that matter). With the Zero you could probably look at reversing how the boards stack (if you haven’t soldered the Zero header already) and just mount the weatherboard with the zero above (or off to the side using a right angle header https://bc-robotics.com/shop/2-x-20-right-angle-header/) – Just be careful with the pin orientations in that case!
Gareth
Is the Raspberry PI HAT hardware required (https://bc-robotics.com/shop/raspberry-pi-hat-hardware/)
I can’t see this as part of the instructions.
Gareth
Hi,
What does the Raspberry PI Hat hardware do? I see it’s listed as part of the components, but not part of the tutorial.
Chris @ BCR
HAT hardware is designed to keep the board from contacting the Raspberry Pi – and keep everything firmly connected – a good idea to have!
Ronny P.
I have a Raspberry Pi Model B revision 2.0 from 2012 lying around. Can this one be used to build a weather station as described in the tutorial?
Chris @ BCR
Hi Ronny,
Yes, any version with the 40 Pin GPIO header will work – you will just need to use an external USB WiFi adapter if you want to connect via WiFi
Sean Twomey
I have a super silly question to ask. To quote your text from above “A 4.7K Ohm Resistor is normally needed to between the 5V and Data Pin when using the sensor; this is taken care of by the Raspberry Pi Weather Board – so no need to wire one in!” I am trying to understand when I would need a resistor, and how to select the correct one for whatever piece I am trying to fit in. What happens if I have a few things wired in? This I know is a super basic question, but thats where I am at. Trying to learn this stuff. Also, I know in this case the weather shield handles he resistor needs in this case, my question was more a general query.
Thanks so much for putting this tutorial together. I am just now trying to fumble my way thru it. I’ve been wanting to do a weather station for a good long while now!
Chris @ BCR
Hey Sean,
In most cases, the item requiring the resistor would have information in its datasheet indicating what additional components are required to make it function. We mention it in the tutorial because it is very common for this sensor to ship with the required resistor in the package as well – which, in this case, is unneeded. Let us know if you have any additional questions!
Simon
This is about the DS18B20 proposed for the station. It is indicated from -10 ° C to + 85 ° C (± 0.5 ° C Accuracy). I would like to use this sensor in winter with temperatures of -40 ° C. What is Accuracy? Is it possible to use this sensor for such cold temperatures especially in Canada?
Chris @ BCR
It will handle -40, they claim right down to -55. From -10 to -29 they state an error margin of +/- 1 Degree , below -30 this increases to +/- 2 degrees.
doug
once you are below -30C a 2 degrees makes no difference, it’s just COLD. lol
Kendrick
Thanks for the great post. This has been on my TODO list for ages. I really appreciate the parts list and well documented instructions.
Mark
Hi, I have built the weather station which works when I manually start the Python code fine. the problem is it wont auto start. Any ideas for what I can try?
Dave Chappelle
You add it as a systemd service. Lots of basic tutorials on the internet to do this.
Brett
Hi. I’ve set this all up on an older RPi 2B model. Getting the ‘Unable to communicate with sensor, check permissions.’ error and /sys/bus/w1/devices is empty. Green light showing on BME280. Any suggestions?
Chris @ BCR
Hey Brett,
Do you have 1-wire and i2c enabled in Raspi-config?
Brett
Hi Chris. Yes so I figured that part out eventually and devices are showing up in /sys/bus/w1/devices. I’ve now got an issue with pip and Python 2.7, as Python 2.7 was EOL 2 months ago. It seems running the latest RPi OS + updates + python may not support these scripts without some python tweaking possibly as the BCRobotics-test-app.py is throwing errors. I am using the latest version of Raspberry Pi OS Lite if this helps.
Brett
So bit of an update and sorry for the long post. I managed to start a fresh install but this time I made sure I used python3 for every install command, with a few other bits and pieces. I had to update about 2 lines of code in BCRobotics.py ‘print “%s\r” % msg’ to ‘print (“%s\r” % msg)’ and add brackets to the very last line as well. My remaining issue is the ds18b20 sensor keeps dropping off and disappearing, causing the engine and StdReport to error out. The only way to temporarily fix this is to completely power down the Pi each time. I have tried 2 separate Pi’s and a 2nd HAT board too which I purchased, same result. Suggestions welcome as I’m almost there 🙂
jm
Hello,
I have bought and received the weatherHat and I thank you.
I wish to “extend” this weather station (add sensors (UV, light, environment, air quality,…), Weewx website,…). For i2c,, no pb, Serial too. For analog, what is the pinout of the 3rd RJ12 ? 3 pairs to the 3 ADS1015 inputs ?
Chris @ BCR
Hello,
The Analog port is pinned as follows:
Looking down on the connector from left to right:
– Pin 1 & 2: ADC Channel 2 (A1)
– Pin 3 & 4: ADC Channel 3 (A2)
– Pin 5 & 6: ADC Channel 4 (A3)
Pins 1,3,5 are GND pins, Pins 2,4,6 are tied to 3.3V through 10K resistors and their respective ADC input. The pullup resistors are easily removable:
– Channel 2: Remove R4
– Channel 3: Remove R5
– Channel 4: Remove R6
Let us know if you have any further questions!
Brad M
Does the kit allow for additional sensors to be added, like a GPS sensor or Air Quality?
Chris @ BCR
Hi Brad,
Yes – additional sensors can be added using the three headers in the top right corner of the board. We break out the UART, I2C, and SPI busses with complete with 3.3V or 5V power. Just insure everything maintains 3.3V logic level signals.
Dave Aldous
Where does the 4 Channel Analog to Digital Converter plug in to the weather board? Thanks.
Chris @ BCR
Hi Dave,
The 4 Channel ADC is built in to the board – there is no need to plug one in
Drew Rokeby-Thomas
Is the 4 Channel ADC accessed via the analog phone jack port (can’t remember the correct term)? Or what is the pinout for the analog port?
Mark Varley
Hello from France and thanks so much for this tutorial, my 14 year old son and I have had a lot of fun building this. We have the Weather Hat running with a SEN-15901 kit from SparkFun. We have had the weather station up and running since August but have never been able to get the rainfall to work. I’ve added some debug print statements in the code but it’s not registering ticks. Wiggling the RJ11 connector seemed to get a tick to register and I also tried a simple test with just and RJ11 cable on it’s own and making the connection I managed to get ticks to register so assumed there was bad connection in the rainfall sensor. Mouser kindly sent me a new kit for free and I have just wired up the new rainfall sensor expecting it to work but it still does not register. Does anyone have any ideas on what I might be doing wrong? Is it possible to wire the rainfall sensor to the Analog port instead and if so what do I need to change in my code to pick up a reading? Thanks for any suggestions
William @ BC Robotics
Hi Mark,
Thanks for getting in touch! Which version of the Raspberry Pi Weather HAT are you using?
Mark Varley
I got this working finally, just a bad connection, the Pi is up and running and working well! https://www.wunderground.com/dashboard/pws/ILETIG4. I have a couple of questions:
– In the summer the temperature sensor seems to get a lot hotter than my neighbours, I have this enclosed in a plastic “hat” taken from an old shop bought weather station, it has plenty of space to breathe and is under a canopy. Should I do something to calibrate this down?
– If we want to add extra sensors do you have any recommendations of compatible sensors or what to consider when buying these? I am using a rpi 3b
Thanks again for an excellent tutorial!
Chris @ BCR
Temperature is highly location dependent – the temperature being read is probably correct for that location, but if your goal is the local average, there are measurement standards set out to achieve the best results. Typically these involve the use of a Stevenson Screen ( https://en.wikipedia.org/wiki/Stevenson_screen ) and locating the weather station in an open area at least 2x as far away from the height of tall objects in the area (at least 100 meters away from a nearby 50 meter tall tree, 10 meters away from the 5 meter tall building, etc.) and 1.2 to 2 meters off the ground.
Over the years I have relocated my station several times. Initially it was in the middle of the yard ~10 meters away from my heat pump, but during cold, calm, nights when the pump went into a defrost / de-ice cycle I could see a noticeable change in the readings in real time – so it was moved further away. That lead me down a rabbit hole of searching for all reasonable parasitic heat sources and eventually ended with going as far as locating the temperature sensor away from the main enclosure as well. I now have the temperature sensor in a separate Stevenson Screen approx. 1 meter away to reduce the Pi’s influence on the temperature.
Going beyond, ground temperature is an easy one to add. You can use numerous DS18B20 sensors on a single bus, so wiring a second one in and sticking it in the ground was rather interesting. I also added a CDS light sensor to the mast (via one of the extra analog inputs). Air quality sensors are becoming quite reasonable as well, but I haven’t gone down that road yet
mikaka
Hi, i want to build something for automated mushroom production, but as far as i can see, both the adafruit BME280 and the pi sensehat are inside the weatherproof case, which makes it a little redundant. any advice about how to weather various sensors such as co2, oxygen, temp, humidity – with 100% humdity? i assume i would need a waterproof case and the sensors outside the case.